Wednesday, July 25, 2012

Piiman no Nikuzume (Stuffed Peppers)


One of our favorite foods is Piiman no Nikuzume - Japanese stuffed peppers.  They're surprisingly quick and easy, and I make them quite often, the only reason why I haven't done a post yet is because in Australia we didn't have real piiman, so I was making them with green capsicums (bell peppers)!  Luckily they taste great made with capsicums/bell peppers so anyone around the world can make them.

This version of Piiman no Nikuzume is our favorite, with a thick, juicy, glaze-like sauce.
(It took me a while to think of those adjectives... in Japanese I would simply describe it as: toro~ri!)
Based on this recipe by ラビー on cookpad.

Piiman no Nikuzume

4-9 small green bell peppers/capsicums(what you really want is piiman but I think they're only in Japan)
300g pork mince
a large handful of chopped shallots (green onions)  OR 1 small onion, chopped very finely
1/4 cup panko (breadcrumbs)
1 egg

Sauce Ingredients (mixed together in a cup):
2 Tbsp soy sauce
2 Tbsp mirin
1 Tbsp sugar
1 tsp dashi powder OR chicken stock powder (Since it's yoshoku, why not?)

2 Tbsp cornstarch, mixed with a little water
  1. Place egg, panko and mince in a mixing bowl, and knead/mix until well combined.  Mix in shallots.
  2. Slice peppers/capsicums in half or, if you couldn't get small ones, (as I often found in Australia) slice in thirds or quarters lengthwise along the natural lines of the capsicum, making sure they have enough depth and roundness to hold the filling in.  You can sprinkle the insides with flour if you like, to help them to stick better, but I find this is not usually necessary.
  3. Heat a little oil in a frypan, and arrange the peppers, skin side down, until the surface just has a grill mark.
  4. Flip the peppers so the pork side is down, press gently.  Cook until well browned.
  5. Flip peppers pork side up again and use a paper towel to wipe excess oil from the frypan.  Add Sauce Ingredients to the frypan and simmer until pork is cooked through.
  6. Place peppers on serving plates.  Add cornstarch mixture to the frypan, stir and bring to boil to thicken.  Pour over peppers.  Serve immediately, with rice and salad if you like.
Sprinkle with Shichimi if you like a little spice.

If you're keeping them for later, do not pour the sauce on yet.  Keep them separate until after re-heating, then pour the sauce on just before serving.

I try to cook the pork as well as possible in step 4, and keep step 5 simmering as short as possible, as I like the peppers to still have a little crispness.


Thursday, June 21, 2012

Kimchi Nabe (Hot-Pot)

Kimchi Nabe (pronounced something like a short "nah-bay")  is one of our long-time Nabe Party favorites, along with Sukiyaki and Shabu-shabu.  We always cook it on a portable gas hob on the low table where everyone can sit around and reach it easily,  adding more of each ingredient as the pot empties.  Nabe parties are the best for conversation and slow, social eating - and they're always full of vegetables, which makes them healthy (and cheap)!

I don't know enough about cooking to say exactly why, but Kimchi nabe tastes amazing, every time. 
(Is that the effect of the Kimchi Umami?)  

And don't worry if you can't handle very spicy food - last time I just used less kimchi, and our 2-year-old had no problem!

Kimchi nabe is extremely easy to make, and just about impossible to get it wrong.  Most of the time I don't even measure the ingredients.
Kimchi Nabe Recipe  (serves 4, just add more veggies and pork to serve up to 6)
100g ~ 400g Kimchi, depending on how hot or mild you like it
300g pork (thinly sliced)
Chinese cabbage
Chives
Enoki Mushrooms (I used Shimeji this time, they're great too!)
Tofu
+/-Moyashi bean sprouts
+/-A bundle of Harusame (Bean thread vermicelli, often used in Vietnamese cooking) soaked in hot water and drained

1~2 tsp garlic
1~2 tsp ginger
1 Tbsp sesame oil
1 Tbsp sake
1 Tbsp miso paste
1 Tbsp ground sesame seeds
2 tsp chicken stock powder
2~3 cups boiling water

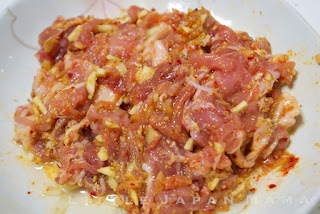
1.  Season the pork:  Using a spoon, scrape out some chilli etc from the kimchi (usually I find some at the top or bottom of the jar) and put it on the pork.  Pour the juices from the jar of kimchee onto the pork.  Add garlic, ginger and 1/2 Tbsp sesame oil to the pork.  Massage it all in with your fingers.  Leave the pork to marinate while you prepare the other vegetables and ingredients.  

(Now, greet your guests as they've just arrived, and have them sit around the table.)

2.  Heat 1/2 Tbsp sesame oil in the nabe (a wok or a frypan is great).  Brown the pork, then add sake, ground sesame seeds, kimchi, water, miso paste (dissolve it in) and stock powder.  Bring to the boil again, then add some of each of the vegetables and tofu, except for chives.  Simmer for a few minutes, then add chives.
3.  Make sure that everyone has a bowl of hot steamed rice, a torizara bowl and chopsticks, and then everyone digs in!
4.  When the nabe is at least half empty, push the remaining cooked ingredients to one side, then into the open space, place some more of each ingredient.

(Torizara means a small plate or bowl for eating a shared meal.  For nabe, the torizara is always a bowl, of course)

The soup is so delicious that you had better have a spoon or ladle ready so that everyone can take some soup together when transferring things to their own bowl.
If you have more than 6 people eating, you might consider making two separate nabe, so everyone can reach it easily.
...
Sadly, we had to leave our do-nabe (clay pot) in Australia, so I was too embarrassed to include the frypan in the photos. (恥笑)
...
If you don't have chives, you can substitute shallots.
...
I guess you could say that Kimchi Nabe is the Japanese adaptation of Korean Kimchi Chige?
Happy Nabe Party-ing!

Wednesday, June 20, 2012

Perfect Takoyaki, from Plain Flour!

And the secret is...
my friend actually worked at Gindaco years ago, so he knows exactly how they make it.
^_^
I still can't make Takoyaki as good as this.  

I did a post on Takoyaki last year, with step-by-step instructions on how to make perfect, crispy takoyaki.  However, at that stage I was still recommending takoyaki flour - I hadn't come up with the perfect, from-scratch takoyaki recipe yet.

So, I've tried a lot of recipes over the years,
and I think I've finally got it!
(Because these takoyaki were to die for!)

But then you say: "without takoyaki flour, surely you need yama-imo, right?"
My answer: Yama-imo might enhance the texture even more, but we didn't use either!
This recipe doesn't need it!
Perfect Crisp Takoyaki Batter Recipe

makes 26-30 large balls
Cups are Australian Metric (250ml), eggs are 60g.

1 cup plain flour
1 1/2 Tbsp cornstarch  (or 1 Tbsp katakuriko)
2 eggs
2 cups water
1 tsp dashi powder or chicken stock
3 tsp Japanese soy sauce

  1. Place flours in a medium-sized mixing bowl, and combine/aerate with a whisk.
  2. Add eggs, dashi powder and half of the water.  Whisk until smooth.
  3. Add soy sauce and the rest of the water gradually, while whisking.
  4. Cover and refrigerate for half an hour, while you prepare the other ingredients:
Boiled Octopus, sliced up into 26 pieces
finely sliced negi (shallots/ spring onions/scallions)
1~2 Tbsp beni-shoga (red pickled ginger) 

     For On Top:
Takoyaki Sauce (or Okonomi or Tonkatsu sauce)
Japanese Mayonnaise
Katsuobushi
Ao-nori

5.  Follow the instructions on how to Make Takoyaki: How to Make Crisp Golden Takoyaki
When all your takoyaki are ball-shaped, pour a drizzle of oil onto the hotplate in-between the takoyaki - enough that the oil goes into the holes under the takoyaki.  This makes the surface of the takoyaki crispy as they actually fry in the oil.  Keep turning balls until they are crispy and golden.


Tuesday, June 12, 2012

Karaage Chicken Recipe for Obento


Karaage is a favorite bento "main", and probably the most popular style of fried chicken in Japan.    The delicious karaage flavour is created by the marinade which includes garlic, ginger and soy sauce.

I certainly don't feel like deep-frying chicken in the morning, so I make a large batch of karaage one evening, serve some of it for dinner with a big leafy salad, and freeze the rest in small bags.  
Since we're mainly making this karaage for freezing and re-heating for super-fast bento, this is the recipe for soft karaage (not super crunchy) - I'll do that karaage in a later post.

Karaage Marinade Ingredients:
1 Tbsp crushed garlic
1/2 Tbsp finely grated ginger
3 Tbsp sake
2 Tbsp shoyu
1 Tbsp sesame oil (or vegetable oil)

900g~1200g chicken thigh fillets, skin on (2~2.5 lb)  (I used 1200g this time)

1 egg
1/4 cup cornflour
1/3 cup flour
generous sprinkle of pepper and a little salt
Oil for deep frying

  1. Slice chicken into randomly shaped pieces around 3x4x1.5cm  (2"x1"x0.5")
  2. Place in a large snaplock bag with all marinade ingredients, massage a little and refrigerate 30min
  3. Add egg, both flours and massage the bag to mix.  The marinade should turn into a thick batter.
  4. Heat oil for deep-frying.  Fry in batches, turning once.  When golden-brown, drain on a wire rack or absorbent paper.  Make sure you cook the chicken right through, but don't overcook - you want to keep them moist.
To Freeze:
Separate into small freezer bags and lay out on a baking tray to freeze.  (I freeze 3 per bag)
When frozen, place in a sealed plastic container to keep them fresh up to a month.
Re-heat in the microwave until hot before putting in your bento.

Use good hygiene and touch the karaage as little as possible at all stages after deep frying to help minimize bacteria and keep your bento safe.  (Use chopsticks, not fingers, to put your bento together!)


1.  Slice the chicken.
2.  Marinate the chicken with garlic, ginger, sake, soy sauce and sesame oil for 30 min.
3.  Add egg, cornstarch and flour.  4.  Deep fry until golden.

Saturday, June 9, 2012

Choco Candy Fork-Picks

A mouthwatering array of chocolates, candy, donuts and cookies!

Each fork-pick measures 3.8~4cm tall.  
Colours of each pick may vary to those shown above, (the manufacturers seem to switch colours around often!) however rest assured I have only stocked sets in which at least one of the "choco" picks is brown.

Mini Onigiri Rice Mold Rabbit Bear Flower Star 4 in 1

This mold makes really mini onigiri!  The rabbit is 3x2.9cm, the bear 2.5x3.4cm, basically everything measures under 1.5 inches.  Which means a single onigiri is a single mouthful - even for my 2 1/2 year-old Ochibi!

One thing I love about this mold is that it's a 4-in-one - it's large enough to hold easily while you fill it with rice, and you may as well make all four at the same time!

Has 6 parts - Base, Top and 4 base plates make them easy to eject.

BENTO SHOP CLOSED AS I'M LIVING IN AUSTRALIA

Here I've made all four shapes with 60/40 brown/white rice mix, with furikake mixed in and wakame eyes.


Alphabet Food Cutters

 Leave special messages in someone's bento lunch, on a birthday cake, or teach your child to read using food!

This cleverly designed alphabet cutter set has all the letters of the alphabet on three rings, which is much less fiddly than dealing with 26 separate shape cutters!  It also has a heart-shape cutter to add an extra sweet touch to your message, or create flowers by cutting out four hearts together, as shown in the picture below.

Letters are 11mm tall and cutting depth is 5mm.
Use the blunt end of a toothpick to eject the letters from the cutter if necessary.
Only letter outlines are cut out, so letters such as O, A, P etc have solid middles.  If you like, use a toothpick to make an indent in the middle.


Sorry... LJM Bento Shop is closed as I am living in Australia now.

Saturday, June 2, 2012

How to Make Soft Mini-Hamburg for Bento

Hambaagu (or "hamburg", as in "hamburger" without the "-er") is something I grew up with, and wondered why we didn't eat them inside a bread bun like other people.  (...And why my mother called them "hambaagu", without the "-er" or "patty"!)  I've figured out the answer since then: Hambaagu is a Japanese thing.

The special thing about these hamburg, is that they're still soft, even after they cool down - one of the requirements for delicious obento foods.  The secret is: lots of panko breadcrumbs, and after cooking on both sides, add a little water to the frypan, put the lid on and steam them, similar to making Japanese-style pan-fried gyouza.  The panko absorbs the water and holds the moisture in.

I learnt how to make these watching a cooking show on Japanese TV, teaching mothers how to make obento for their kids when they start kindergarten.  Mini-Hamburg and Chicken Karaage were named as the favorite bento "main" okazu for kids.  (Japanese cooking shows are really useful!)  I didn't write down the recipe at the time so I pretty much guessed it.  You can't go wrong.  I cook mine on a large electric okonomiyaki hotplate.

Ingredients:
400g pork mince (if your mince is low fat, mix in 1 Tbsp vegetable oil or Japanese mayonnaise)
Panko or homemade breadcrumbs: Almost the same volume as mince (maybe 1 cup? didn't measure)
1 small onion, sliced very finely
1 egg
1 Tbsp milk
1 Tbsp soy sauce
2 tsp sugar
a sprinkle of salt and pepper

1.  Combine all ingredients in a bowl.  It should be moist, if not, add another Tbsp milk.
2.  Pre-heat a large frypan to med heat, wipe with a little oil.
3.  Shape mini-hamburg in your hand and place them on the frypan (about 4~5cm dia)
4.  Turn when browned and cook until browned on both sides.
5.  Pour a little water onto the frypan (enough to cover the base of the frypan, about 1/4 cup, depending on the size of the frypan and how much you are cooking) and immediately put the lid on to keep the steam in.  After a few minutes when all the water has absorbed into the hamburg, they're done!  (Be careful not to burn yourself with steam when you open the lid.)
 6. Wash the residue from the frypan before cooking the next batch.
 Storage:
1.  Allow to cool before bagging for the freezer.
2.  Laying the bagged hamburg out on a baking tray allows them to freeze faster and keeps them separate.
3.  Once they're frozen, place all the bags into a freezer-safe lidded container, and they'll be fresh for up to a month.  (I use one with a hinged lid, it's easier to open and close)
4.  Reheat 3 hamburg on a plate in the microwave on high for 1 minute, or until they are hot right though.  Use however you like in your bento.

Thursday, May 31, 2012

Kawaii Chopstick and Case Sets

Don't just eat your bento with cute chopsticks, carry them in an adorable matching case!

Update: Sorry, Bento Shop is closed.  I hope you enjoy the recipes on this website instead!


Silicone Pancake/Egg Rings

These silicone pancake/egg rings produce the most adorable shaped pancakes and eggs.  The wide silicone base fits snugly to the surface of your frypan and helps to prevent egg or pancake mixture from escaping.  (Although a little may escape here and there, I think they work better than the old style metal ones!)

Rabbit, Bear, Heart and Star shape are perfect for eggs or small pancakes.
Large Bear is the right size for regular-sized pancakes.

Use your imagination with other ingredients!  Use in the frypan or oven.


(Archive) Mini Onigiri Mold Set - Flower and Bear

 What I love about these is the 3-dimensional shape of the top of the onigiri!  The flower petals are rounded and the centre of the flower is indented, just like a real flower!
And the place for the bear's nose is indented so you can place a little ball of rice in a different colour for his nose.

The flower and bear mini onigiri molds make perfect-sized onigiri for my little Ochibi's bento box.

Their small size also makes them easier for a small child to eat.

Very easy to use, just fill, press and push the white backing to eject.  (The molds have a hold in the base to poke your finger through.)
Flower 4.5cm diameter


Mini Heart Silicone Cups

 These adorable little silicone heart cups are the perfect size for umeboshi or other small portions of  Japanese pickles.

They are also the perfect size for making gorgeous heart-shaped chocolates!

Oven, Microwave and Freezer Safe  -40°C to 230°C

Mini Heart Silicone Chocolate/Dessert Cups  Set of 10  $3.50